
How to Use a Manual Tire Changer: Step-by-Step
This post contains affiliate links. As an Amazon Associate, we earn from qualifying purchases.
How to use a manual tire changer starts with full deflation, bead breaking, clamping or centering, lubrication, and controlled bar work. Inflate only to the tire manual PSI (pounds per square inch). Sources differ on bead-seating pressure, so check both the tire and machine manuals before inflation.
Full deflation is the first safety lock. The valve stem must stay open or the core must come out, depending on the manual you follow. That disagreement decides whether trapped air stays behind the bead.
What follows: setup checks, the bead sequence, the inflation debate, and the rim-saving habits that separate a clean mount from a scratched wheel.
Key Takeaways
- Deflate fully before bead work; Harbor Freight says keep the stem uncovered, while Derek Weaver and Ken-Tool say remove the core.
- Match the tire to the machine; the 69686, T601, and CH-22 manuals list different size ranges.
- Lubricate both bead sides and the rim flange, then use the bar with controlled force.
- Avoid high-end rims when the manual warns about scratches and slight marring.
- Check leaks and balance before the tire goes back on the vehicle.
Safety Checks Before You Touch the Bar
The Harbor Freight Tools (model 69686) manual calls for ANSI-approved safety goggles and heavy-duty work gloves. Derek Weaver says read the manual completely before use. Ken-Tool warns that tire changing should be done by trained persons, because improper work can cause injury or death.
A manual tire changer uses a center post or rim clamp, a bead breaker, and a mount/demount bar. The operator deflates the tire, breaks the bead, then levers the bead over the rim flange with lubrication and controlled force. Sources differ on maximum bead-seating pressure, so check the tire manual and the machine manual before inflation.
Before you start: Remove the valve core or keep the stem uncovered, according to your manual. Check for hidden utility lines before drilling. Keep bystanders away, and don’t work tired or impaired.
Pinch points are real. The jaws, bead breaker shoe, and bar can trap a finger fast. TSI’s CH-22 manual warns to wear safety glasses and watch for pinch points. TSI also says don’t wear loose clothing.
I keep the work area clean and wide. A slippery floor or a crowded bench turns a slow job into a dropped tire.
Gloves, Shoes, and Hearing Protection
Derek Weaver recommends tight leather or mechanics gloves, steel-toe leather shoes with oil-resistant soles, and eye protection. The guide also suggests hearing protection in enclosed or noisy spaces.
What Tools and Materials Does a Manual Tire Changer Need?
You need more than the changer. The bar, shoe, and clamps do the mechanical work, but the small items decide whether the tire slides or bites.
- ANSI goggles and heavy-duty gloves, per the 69686 manual.
- A valve core removal tool and a marking crayon.
- Approved tire lubricant.
- A bead breaker handle and mount/demount bar.
- Steel-toe shoes and hearing protection if the space is enclosed or loud.
Use tire lubricant on both bead sides and the rim flange. The changer pairs with tire changing tools like a bead breaker handle and mount/demount bar.
Skip lubrication and the bead drags. The 69686 manual says failure to lubricate the breaker handle can damage the tire. Ken-Tool names Bead-Eze or similar tire lubricant.
How Do You Mount and Clamp the Changer to the Floor?
A loose changer moves at the worst moment. The 69686 manual says mount it to a secure, level surface that can hold the machine and tire assembly.
Assembly Parts to Check
- Bolt the center post to the post base with the supplied hex bolts, washers, and nuts. If the bracket points the wrong way, the base sits crooked.
- Set the bead breaker shoe holes to the closest hole to the center post for smaller tires. If you skip the clevis pin and R-clip, the shoe can slip.
- Verify no hidden utility lines before drilling. If you hit one, you have a utility strike. The tire job waits.
I check the floor before the drill goes in.
Mounting hardware differs. Ken-Tool says use bolts no smaller than 1/2 inch and no wood screws. TSI says use 3/8 inch hardware to bolt the CH-23 stand to a cement floor. The Ken-Tool T600/T601 manual and TSI CH-22/CH-23 manual give those numbers. TSI says no power or air is required, but the unit should be bolted to a solid, clean, level surface.
If you’re choosing equipment, review the best tire changers for clamp style and capacity.
The Bead Breaking and Demount Sequence
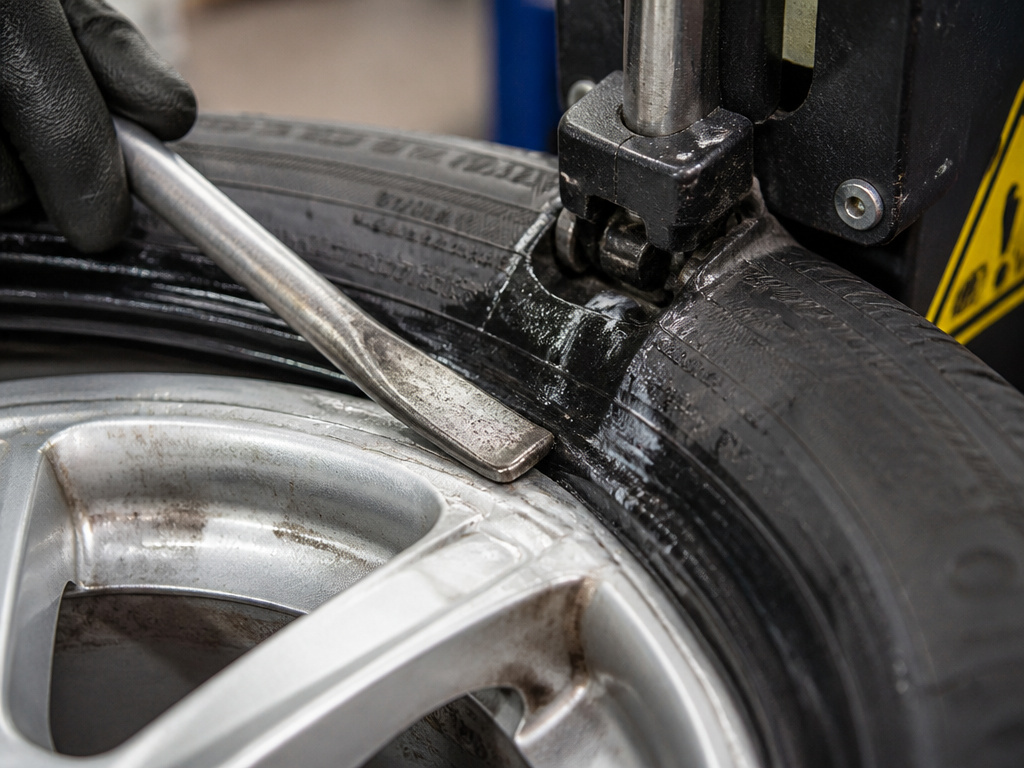
Breaking the bead is the loudest part. The bead is the tire edge that seals against the rim. A properly deflated tire gives with a rubbery pop. A sharp crack means stop.
- Deflate the tire completely. The 69686 manual says keep the valve stem uncovered; Derek Weaver and Ken-Tool say remove the valve core. If air stays, the bead can jump when the shoe presses it.
- I stop if the tire still sighs air.
- Position the wheel and clamp or center it. The TSI CH-22 manual says the longer area of the rim should face down for the jaw clamps.
- Lubricate the breaker handle and both bead sides. The 69686 manual warns that skipping this can damage the tire.
- Place the demount end of the bar between tire and rim, flat side against the rim, rounded side against the bead. Ken-Tool says push it forward until the bar clicks into position against the rim.
- Lift the first bead over the flange. Use the center post or clamps for support. If you force it dry, the bead can roll instead of slide.
Easy to miss: Don’t hammer the bar on the side of the tire. The 69686 manual says that damages the tire.
The same bead breaking principle applies if you start with hand tools.
How to Use a Manual Tire Changer for Mounting
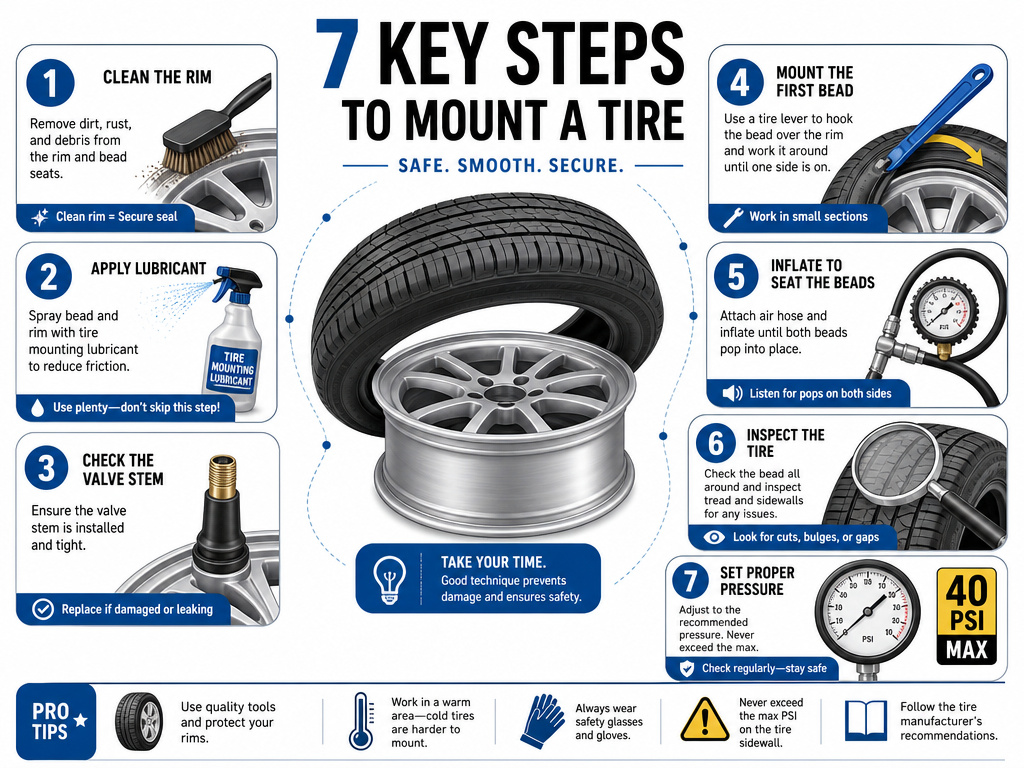
Mounting is where patience pays. The tire has to slide onto the rim without the bead folding or the valve stem getting trapped. A dry mount sounds like a sucking brake; a wetted bead slides with a soft hiss.
- Clean the bead seat. A gritty seat is where slow leaks start.
- Lubricate the tire and entire rim flange area. TSI says use lubricant intended for tire and rim.
- Check valve stem access. TSI says the stem is often up; if not, mount the tire and flip the assembly to add air.
- Use the hook end of the bar to wedge the outer bead under the rim. The 69686 manual says push down until one side is under the rim, then switch ends and wedge.
- Inflate with a clip-on chuck, a long hose, and a hand-held pressure valve. Ken-Tool says keep clear of the trajectory zone, the path where a failed bead or wheel part can fly.
- Inspect the tire and wheel for matched size, wear, or defects before mounting. Ken-Tool says don’t use flammable materials when servicing tires and wheels.
- Stop at the pressure listed by the tire manual. The 69686 manual warns against over-inflation. Derek Weaver says don’t exceed 40 PSI when seating beads. The manuals don’t fully agree on the bead-seating ceiling, so use the lower printed limit when both apply. If the tire manual gives a lower seating pressure, use it.
Valve Stems and Bead Seats
I used to treat a slow leak as a bad mount. Then I kept seeing the same pattern: an old stem, a gritty bead seat, or a dry bead that rolled during inflation. I now replace the stem, wipe the seat, and lubricate before the bar touches the rim.
The final step overlaps with mounting a tire and seating the bead.
Where Do the Manuals Disagree About Size, Hardware, and Pressure?
Specs first, opinions second. The manuals don’t give one universal manual tire changer rule.
| Issue | Source A says | Source B says |
|---|---|---|
| Max tire size | 69686: standard tires not over 16 inches; flotation not over 12.5L16 | T601: 4 to 15 inches; CH-22: 4 to 16.5 inches |
| Floor hardware | Ken-Tool: bolts no smaller than 1/2 inch; no wood screws | TSI: 3/8 inch hardware for CH-23 stand on cement |
| Full deflation | 69686: deflate and keep valve stem uncovered | Derek Weaver and Ken-Tool: remove valve core and probe |
| Bead seating pressure | Derek Weaver: don’t exceed 40 PSI | 69686: inflate to tire manual PSI; no seating limit stated |
The size table is a warning. If your wheel is outside your machine’s printed range, stop. I match the wheel to the printed range before I clamp.
Ken-Tool says ensure tire and rim sizes match; mismatched components can cause serious injury during inflation. For smaller tires, the 69686 manual points to the Mini-Tire Changer (34552). The 69686 manual caps standard tires at 16 inches and flotation tires at 12.5L16. Flotation tires are the wide, low-pressure tires used on some trucks and equipment.
If you’re deciding between manual and powered methods, a manual changer trades air and electricity for technique, floor bolts, and slower tire work.
The Harbor Freight 69686 owner’s manual, Ken-Tool T600/T601 manual, and TSI CH-22/CH-23 manual are the primary sources for those limits.
The Harbor Freight 69686 is the one to check for standard car and light truck tires up to the printed ceiling. The Ken-Tool T601 (38601) floor model covers 4 to 15 inch tires. The TSI CH-22 covers 4 to 16.5 inch tires.
If you’re practicing demounting before mounting, tire removal follows the same bead and bar logic.
Common Mistakes and Maintenance That Keep the Machine Honest
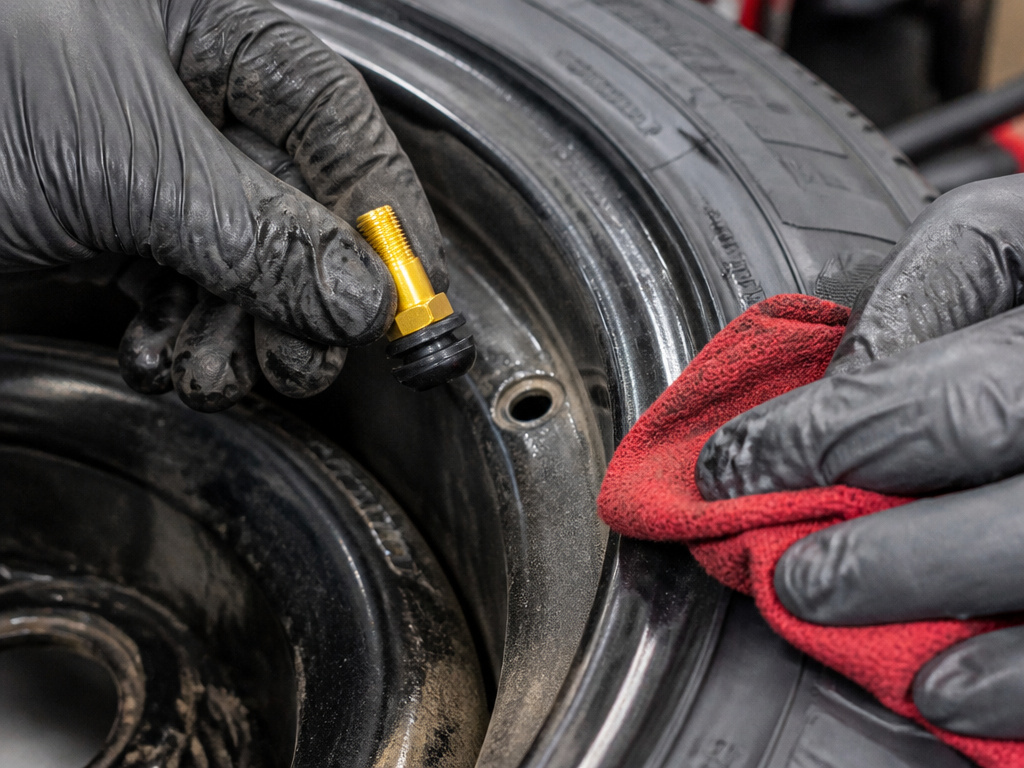
Failures happen before the tire spins. They happen at the stem, the seat, and the bolt you skipped. I check the stem and seat first.
What most people get wrong: Reusing an old valve stem leads to slow leaks.
- Wipe excess bead oil after each use, per the 69686 manual.
- Inspect for loose bolts before each use, per TSI.
- Check connections regularly, per the 69686 manual.
| Symptom | Likely cause | Fix |
|---|---|---|
| Bead won’t break | Tire still holds air | Deflate, remove core, probe |
| Bar sticks | Dry bead or dirty flange | Lubricate tire and rim flange |
| Rim shows marks | High-end rim or slipping shoe | Protect rim or use a shop |
| Slow leak | Reused stem or gritty seat | New stem, clean seat, recheck |
Ken-Tool says use the tire tool only for mounting or demounting.
How to maintain a manual tire changer
Perform a visual inspection before each use. Check for loose bolts, damaged parts, or improper assembly. Do not use the machine if any parts are loose or damaged. Regularly inspect all connections to ensure they are secure. After each use, wipe any excess bead lubricant off the machine. Keep the work area clean to avoid slipping and to have enough room to operate safely. Store the machine in a dry location. Use tire tools only for their intended purpose of mounting and demounting tires.
Frequently Asked Questions
Can you use a manual tire changer on a large wheel?
Only if your machine manual lists the size. The 69686 manual caps standard tires at 16 inches, while Ken-Tool’s T601 lists 4 to 15 inches. Check the printed range before clamping.
Do I need to remove the valve core?
Some manuals say deflate and keep the stem uncovered. Others say remove the core and probe for blockage. The safe move is to confirm no air remains before breaking the bead.
How much lubricant should I use?
The sources say use an adequate amount on both bead sides and the rim flange. They don’t give a fixed quantity. Cover the contact areas, then keep the bar and shoe from grabbing dry rubber.
Can a manual tire changer scratch a high-end rim?
Harbor Freight warns that tire removal and installation can cause scratches and slight marring on high-end rims. Other manuals don’t repeat that warning, so protect the rim or pay a shop if the wheel finish matters.
Should I balance the tire after mounting?
Yes. The 69686 manual says check for leaks and balance the tire before putting it back on the vehicle. A mount that seats air can still ride rough.
Before You Go
The real threshold is simple: if the tire still sighs air, stop. If the wheel is a polished alloy you can’t replace, stop too.
Do this before your next mount: take the valve core out, wipe the bead seat, and put a fresh stem on the bench. That small kit beats arguing about a slow leak later.
The 40 PSI bead-seating limit comes from Derek Weaver Co. The manuals don’t agree on one universal rule. When you practice how to use a manual tire changer, the slow, clean sequence beats the fast, scratched one.
I’d rather clean the bead seat now than chase a slow leak later.
